Summary
- Start with binoculars! They’re cost-effective, flexible, easy to use, and portable for budding astronomers.
- A 10×50 pair are a good budget buy. A 15×70 pair is a big step-up for around $300.
- Look for multi-coated lenses and a tripod mounting point, and budget for a basic tripod too.
- Pricey image stabilized binoculars don’t make sense for most people.
Not only can binoculars be used to get started with astronomy, they actually have some advantages over a telescope. Here’s what you need to know.
The Risks of Diving Straight in With a Telescope
A wise person said that the cheapest way to buy any expensive product is to “buy the right thing first.” In other words, don’t buy a cheap model first, which you’ll later replace with a better model, and eventually with the best model for your needs. Buying the best one first is cheaper than buying the cheap model plus the better model plus the best one.
While that’s great advice, it does have a couple of fatal flaws when it comes to a potentially expensive hobby like astronomy. First, you have no idea when you start out whether your interest will turn into a life-long passion, or be a fleeting interest before you move on to something else. Buying an sophisticated telescope setup you use for a month or two could be a very expensive mistake. Second, even if you’re sure you’ll stick with it, you don’t know enough at the outset to tell the good from the bad.
For both reasons, most people who jump straight in with a telescope tend to buy a model they’ll either abandon or quickly outgrow. Either way, it’s a waste of money.
Using a pair of binoculars initially is more sensible because many of us already have a pair that will be good enough to get us started, or we’ll know someone with a pair we can borrow.
Four More Reasons to Start With Binoculars

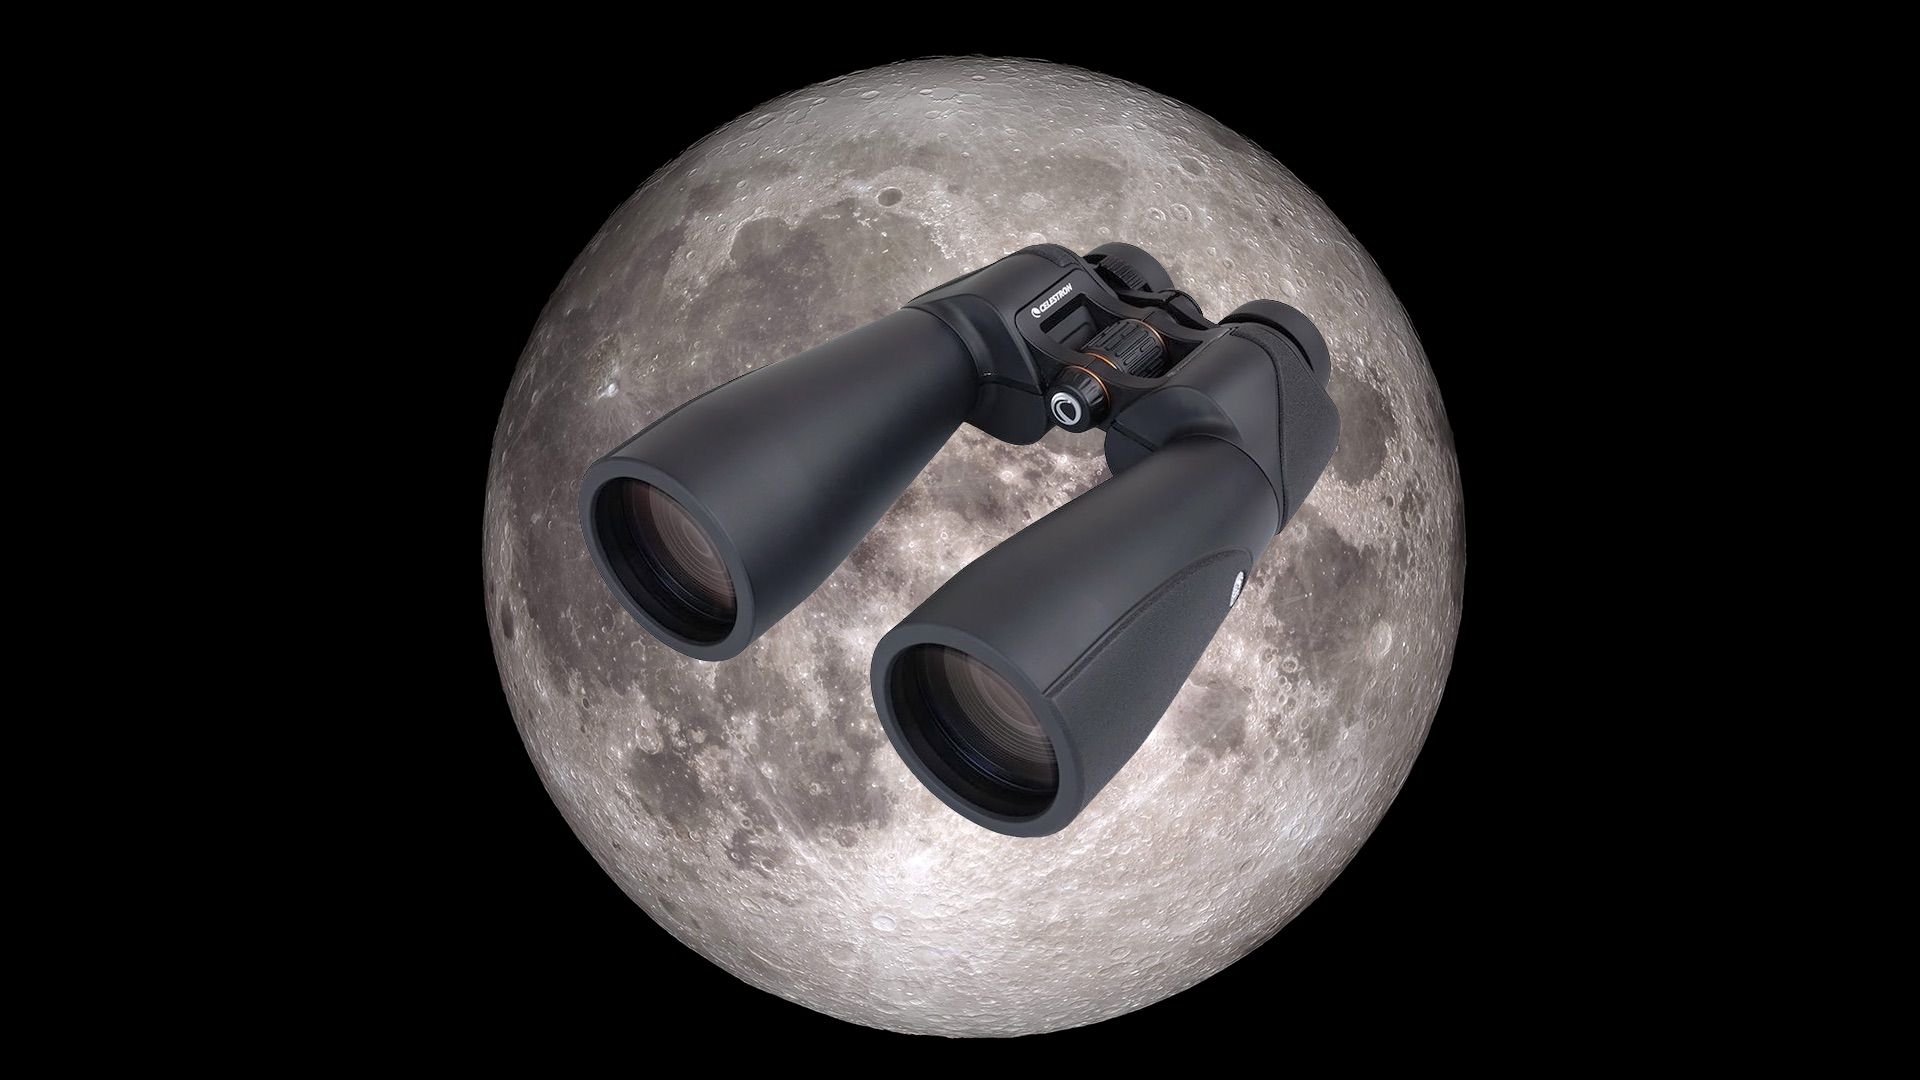
You’ll see two main numbers on a pair of binoculars, expressed as NxNn. For example, 10×50.
The first number refers to the magnification power of the binoculars, so 10x means that you’ll see things ten times larger through them than you would with the naked eye. The second number describes the aperture size in millimeters. So a x50 means that the outer lens measures 50mm across. The larger that number, the larger the field of view—that is, the bigger the area you can see at once.
A 10×50 pair has ten times magnification and a relatively generous 50mm aperture. That offers sufficient magnification for seeing quite a few things in the night sky, and a sufficiently wide aperture to make it fairly easy to find things. It’s also a very common spec for binoculars, so you’ll get a lot of choice and be able to buy a pair for a very affordable price, starting at well under $100. For all these reasons, it’s a common recommendation when you’re just dipping a toe in the water. This Celestron pair is a little over $100, but a great buy.

Multi-Coated Lenses Are Worth the Premium

Some binoculars will boast “coated optics” or “multi-coated lenses.” These coatings are designed to reduce reflections and thus improve image contrast. If they simply say “coated optics,” that typically means only the exterior (“objective”) lens is coated. “Multi-coated” usually means all the lenses are coated, reducing internal reflections, and this is definitely worth paying more for when it comes to night viewing in general and astronomy in particular.
The other thing you’ll see in relation to the lenses is ED glass. This stands for extra-low dispersion, and is a high-quality glass designed to reduce chromatic aberration. Chromatic aberration shows up as colored fringes around the edges of objects being viewed, and is a common problem when viewing the night sky. ED glass dramatically reduces color fringing, but does add a fair bit to the cost.
A Tripod Mounting Point and L-Adapter Is Essential

Astronomy obviously involves looking at objects a very long way away. That means a tiny movement in the binoculars translates to a huge movement in the area of the night sky you’re viewing. Handheld use is only practical for the most casual of use, like looking at the Moon on that weekend away while bracing against a wall or a tree.
Fortunately it’s neither difficult nor expensive to get a stable view. Just ensure the binoculars have a tripod mounting point (a threaded hole). You then just need an L-adapter to allow mounting to a tripod. If the binoculars don’t come with this, they only cost a few dollars.
Why and How to Choose a Tripod
The wry advice you’ll hear photographers give about tripods is “Solid, light, cheap—pick any two!” In other words, you can buy a solid and lightweight tripod, but it will be expensive. If you’re looking at budget tripods, then you’ll need to choose between one that’s dependable and one that’s light.
Given that most people start out viewing from their back garden, or driving a little way out of the city to avoid light pollution, then the weight of a tripod isn’t usually important, so aim for one that is as solid as possible. Heavier ones are actually an advantage here as they are less easily knocked. Look for all-metal construction, and you shouldn’t need to spend more than $70 or so.
Why Most People Shouldn’t Buy Image Stabilized Binoculars

Finally, the alternative to a tripod is a pair of image stabilized binoculars. These have inertial motion sensors and motors to move the lenses within the body of the binoculars to cancel out hand movements. That eliminates (a certain amount of) hand-shake.
It’s a great technology, but has its limits. It also adds a lot to the cost, taking you into four figures. At that kind of price point, you’ll generally be better off with a decent telescope and mount.
A basic pair of 10×50 binoculars and a budget tripod will get you started for a total spend of around $150. If you’re happy to invest a little more then the Celestron SkyMaster Pro ED 15×70 ticks all of the boxes mentioned above (including multi-coated lenses and ED glass) for around $300, plus the cost of a tripod. Finally, add a free or low-cost smartphone app to help you find things.